I thought I would do another little instructional series. This time on how to do a good head shot.
The basic ingredients for a head shot are obviously pretty simple:
1. A head (preferably attached to a body)
2. A camera with a long-ish lens
3. Lights/reflectors (optional)
4. A suitable background
5. Appropriate clothing
6. Image editing software (optional)
Putting them together just right can be the difference between an OK head shot and a great one.
 1. A head
This is probably the second most important part of head shot photography. Although heads are fairly common, it is slightly less common to find a head that wants (or likes) having its picture taken. Most often this head will be in the form of a person needing a photograph, however it is not uncommon to go out and find consenting people who will agree to a head shot even if they don't particularly need one.
One of the first things you will want to do, should you be photographing someone who needs a head shot, is to find out how they will use the photo. Pretty basic. You don't want to photograph a gentleman in his workout clothes if he needs the photograph for an annual report. This doesn't really require much more explanation.
2. A camera with a long-ish lensThe camera/lens is the most important part of head shot photography. Although, arguably only slightly more important than the head itself. Without a camera there is no photograph!
Why a "long-ish" lens? This is because of the pleasing effect of a telephoto (or long) lens commonly known as "compression". Typically we think of compression in terms of backgrounds and the effect it has on them. However, if your subject should have a rather large nose, the compression of the long lens will help make it not as noticeable. Unfortunately this doesn't work for ears.
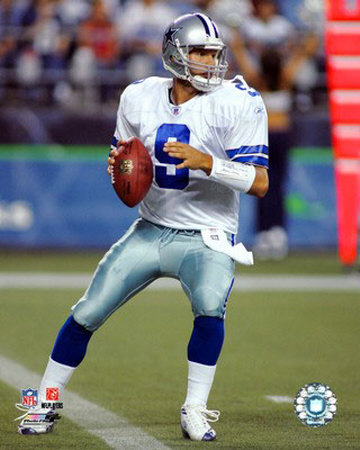
Whenever you watch a football game (or most other commonly televised sporting events) you will notice how when a player is on the screen, he/she is sharp and clearly focused while the people in the stands behind them are turned into a big blur of color. (See image for example) This blur is a direct result of a long lens and the compression it creates. This is especially useful in photography as you want the subject of your head shot to stand out and be the center of focus. You don't want the viewer to be looking at the background.
Another reason for a long-ish lens is that wide-angle lenses tend to make your subjects look un-realistic. Typically with wide-angle lenses, anything not directly in the center of the lens will be skewed or stretched a bit. If you ask photographers that do a lot of head shots what their favorite lens is, two lenses will pop up very frequently among the answers. They are the 85mm prime lens, and the 70-200mm zoom lens.
The 85mm offers razor sharp images because it is a prime lens (primes tend to be more sharp because they don't have as many elements as a zoom lens). It is, however, possible to convert any prime lens into a zoom lens. To do this, simply use the two appendages below your waist to move you closer or farther from the subject.
The 70-200mm lens is a great portrait lens because it allows the flexibility to zoom in very close to the person, while remaining a safe distance away in case they didn't take a shower that day. The 200mm end of that lens offers amazing compression which makes for very flattering portraits and head shots, but with the twist of the wrist, a wider shot can be composed for variety.

There are many other lenses that offer a farther focal length than 200mm, such as the 300mm or even the 400mm lenses. However, the drawbacks to using these are 1) super-telephoto lenses can cost upwards of $5,000. 2) The lenses are VERY heavy and cumbersome to use, allowing limited mobility. 3) In order to frame the subject properly, the photographer would have to be so far away that communication would be limited to smoke signals, walkie-talkies, and signal flags.
3. Lights/reflectors (optional)
Having lights and/or a reflector will help you to have more versatility. For example, a reflector is commonly used to reflect light into a darker part of the face. However, it can also be used to keep light off of the face altogether. Having lights means you don't have to battle the harsh sun light. Simply find a spot of shade, or use the reflector to block the sun, and you can provide your own light, however you want it to look - hard/soft, strong/weak, colored/neutral, left/right, from above/below, etc.

Typically, head shots are lit with soft light, either from a light source with an umbrella or softbox, or with light reflected from a large (white) surface. However, if the face is right or the client requests it, hard light can be used to make a much more dramatic portrait.
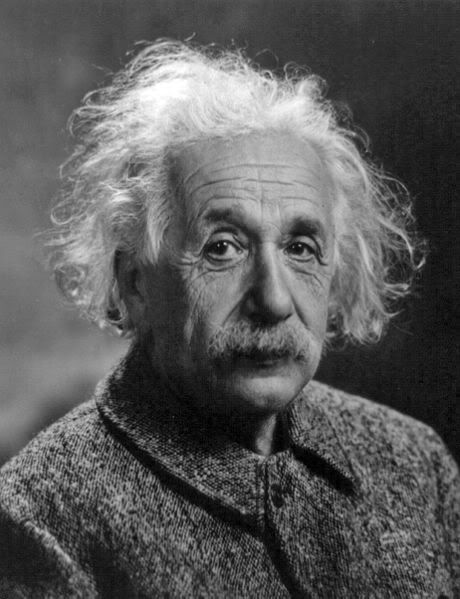
If the subject is a female, or if the subject's hair blends with the background, a hair light is typically used. The hair light will create a nice highlight on the subjects hair, which is flattering and also serves to keep the person's head from blending in to the background. (As illustrated by the painting/portrait to the left)
Labels: compression, dramatic lighting, head shot, how to, light, lights, long lens, portrait, reflector
